
Showing posts with label Recipes. Show all posts

Wednesday, March 3, 2010

Blueberry Banana Muffins

I hadn't baked in a while and wanted to make use of my new muffin pan so decided to bake some blueberry banana muffins (since thats what I already had at home).

Here's what you need:

1 cup whole-wheat flour
1 cup all-purpose flour
1 teaspoon baking soda
1/2 teaspoon salt
1 stick unsalted butter at room temperature
1/3 cup granulated sugar
1/3 cup packed light-brown sugar
2 large eggs
2 ripe bananas mashed
1/3 cup milk
1 teaspoon pure vanilla extract
1 cup blueberries

1 teaspoon all purpose flour to sprinkle on the blueberries. 

Before baking...

Preheat oven to 375o. 
Mix together the flours, baking soda, and salt in a bowl
In another bowl combine the mashed bananas, milk, and vanilla
Sprinkle the blueberries with the 1tsp of flour.
Beat butter and sugars together
Add the eggs one at a time until well incorporated.
Add flour mixture and banana mixture to butter mixture, alternating between the two.
Once its all combined, stir in the blueberries.

Line a 12-cup muffin pan with paper liners and divide batter into them.
Bake for 25 mins or until a toothpick inserted in the center comes out clean
Transfer to cooling rack.

After baking  :)

They aren't too sweet and make a great quick breakfast or snack. Enjoy!

Monday, February 8, 2010

Yummmmm

This is what we had for dinner the other night...


Greek version of lasagna, otherwise know as Pastitsio. Delish! And now I get some leftovers - which I typically don't like, but dishes like this only taste better!

Wednesday, December 16, 2009

Bittersweet Decadence Cookies

With the holidays just around the corner, I'm even more in the mood to bake! So I wanted to share another of my favorite recipes from Alice Medrich's cookbook Bittersweet with you. These cookies are to die for (if you like chocolate)!

Ingredients:

1/4 cup flour
1/4 tsp baking powder
1/8 tsp salt
8oz bittersweet or semisweet chocolate, coarsely chopped
2 tbsp unsalted butter
2 large eggs
1/2 cup sugar
1 tsp pure vanilla extract
2 cups pecans, chopped into large pieces
6 oz bittersweet or semisweet chocolate, cut into chunks (or you can use store bought chocolate chips)

Process:

Preheat oven to 350oF. Line 2 cookie sheets with parchment or wax paper

Chop the chocolate


In a small bowl, mix the flower, baking powder, and salt together thoroughly. Set aside


Place 8oz of coarsely chopped chocolate and butter in a large heatproof bowl over a saucepan of simmering water. Stir until melted and smooth. Remove chocolate from saucepan and set aside (keep water simmering for use in a further step). 


In another heatproof bowl whist the eggs, sugar, and vanilla thoroughly. Set the bowl over the simmering water and stir the mixture until it is lukewarm. 


Stir the eggs into the warm chocolate mixture.


Stir in the flour mixture


Stir in the chopped pecans and 6oz of chocolate


Scoop slightly rounded tbsp of batter onto the cookie sheets, placing them about 1.5 inches apart.


Bake for 12-14 minutes. The surface of the cookies will look dry but the center is still gooey. Place on cooling rack and let cool completely.


And enjoy! 

Thursday, November 5, 2009

Home Made Apple Pie - Greek Style

I love apples. And they are everywhere this time of year. We were in our little groccery store the other day and there were a ton of locally grown apples. So I got some to make my favorite apple pie. Its a simple recipe but a little labor intensive in assembly. And since Mr. Milk has been away on business, I figured it would be nice for him to come home to some yummy baked goods! So here it goes.

Ingredients:

5-6 medium apples (I picked fuji cause they are my fav)
1 cup sugar plus 2 tbsp
2 tsp ground cinammon
1 cup vegetable oil (I use corn oil)
2 tsps baking powder
1 tsp pure vanilla extract
3 eggs
lots of flour! (around 6 cups I would say but have more)

Process:

Preheat oven to 350 degrees


Peel the apples. Take a box grater and use the large grating surface to grate the apples.


Grate as close to the cores as possible


Sprinkle apples with 1.5 tsps sugar and 1 tsp cinammon and stir. Set aside.


In a seperate bowl mix together 1 cup sugar, 3 eggs, baking powder, vanilla, vegetable oil.


Start to add the flour. The goal is to get a consistency that is thicker than regular cake batter. You want it to pull away from the sides as you mix it.


Pour 3/4 of the batter into the baking dish


Continue to add flour to the remaining batter until it turns into a ball of dough (like pizza dough)


Pour the apple mixture over the cake batter layer. The apples will probably have released some liquid so try to avoid adding that.


Take the box grater and using the largest grating surface again, grate the ball of dough over the apple mixture.


Sprinkle with remaining sugar and cinammon and bake for about one hour.


And Enjoy!

Wednesday, October 21, 2009

Warm Mocha Tart

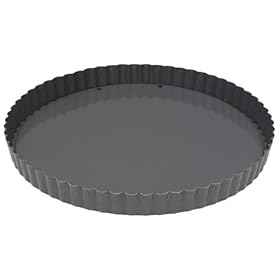
This past Wednesday, I decided to have a "me" day. I indulged in activities that I enjoy and generally had a girly day. One of the things I did was bake. Using chocolate of course! So I thought I'd share my creation with you. I found the recipe in the book Bittersweet by Alice Medrich. It was given to me as a gift by my chocoholic friend and I love it. There are some amazing recipes in it. This recipe asks for a 91/2 inch fluted tart pan with removable bottom. 

It is worth investing in one of these (can find one for $10-15) if you plan on making this often as it makes it easy to remove the tart once its baked. Otherwise just make it in whatever round pan you have. The first piece will probably be difficult to remove but you should be ok after that. So lets begin:

Ingredients for the crust:

8tbs (1 stick) unsalted, melted butter
1/4 cup sugar
1/8 tsp salt
3/4 tsp pure vanilla extract
1 cup all-purpose flour

Ingredients for the filling:

3 tbs unsalted butter, cut into chunks
1/2 cup sugar
1/4 cup unsweetened cocoa powder
1 cup heavy cream
11/4 tsp instant espresso powder or instant coffee crystals
1/2 tsp pure vanilla extract
1 large egg, lightly beaten

Preheat oven to 350oF

Mix the butter, sugar, and vanilla in a bowl to make the crust. Add the flour and mix till well blended. The dough may seem too soft but this is fine. Press it evenly and thinly onto the bottom and sides of the pan


Bake for 20 to 25 minutes or until the crust is a golden brown


In the meantime start to make the filling. Place the butter, sugar, cocoa powder, and cream in a medium saucepan over medium heat. Stir until the mixture is blended, smooth and begins to simmer around the edges. Remove from heat and stir in the instant espresso or coffee powder and vanilla. 


Just before the crust is ready, whisk the egg thoroughly into the hot choclate mixture. Pour the filling into the hot crust.


Place the pan into the over and turn the oven off (yes, off). Leave the tart in the over till it quivers like Jell-O. The recipe says this will take 10 to 12 minutes but I've found that it needs more like 20 minutes. 


Let cool on a rack and serve at room temperature. 


Yummmm


The coffee flavor is pretty mild in this tart so its great for those who don't particularly like coffee. Enjoy!

Monday, September 21, 2009

Weekend = Brunch!

I am not a huge breakfast person. At best you'll catch me with a slice of toast, or on days when I want something more, a bowl of cereal. I am, however, a brunch person! This probably all fits under the umbrella of not being a morning person. What's worse is that I really enjoy sleep! In my ideal world, people would not have to be in to work till around 10am. This would enable me to get up at a reasonable hour in the morning and have a couple of hours for my brain to kick in (probably a whole different post!) before I had to be at work. So on the weekend when Mr. Milk is also around, I enjoy making meals for brunch.

We were in a nice grocery store the other day and I found a package of mixed mushrooms. I love mushrooms! There were oyster mushrooms, chanterelles, shiitakes, enoki mushrooms, criminis, and I had some button mushroom at home too. This inspired me to make a mushroom scramble over the weekend. And what makes mushrooms better? Truffle salt! Granted if one could afford the ridiculously expensive truffles themselves they would probably taste amazing, but alas truffle salt is already a luxury in and of itself. I also got a beautiful heirloom tomato and figured I could incorporate it somehow. So without further ado, here is my creation:


Aren't those mushrooms and the tomato gorgeous!


Sauteed mushrooms and onions...yum!


Heirloom tomato, arugula, spinach salad.


The end result! What a way to start your morning - or noon-time :)

Here is the recipe for 2 people:
  • 1.5 cups mixed greens of your choice
  • 1 medium sized heirloom tomato
  • 2 cups sliced mixed mushrooms, any kind you like (they wilt down quite a bit)
  • Half a small onion diced
  • 3-4 eggs
  • A handful of your favorite grated cheese. I used mozzarella
  • Truffle salt
  • Olive oil (both for cooking and the salad)
  • Balsamic vinegar
  • Salt and pepper to taste
  • Whole wheat toast
1. Clean and slice the mushrooms. Put a tablespoon of olive oil in a pan and sautee them.
2. When they start to brown up a little add the onion.
3. As these cook, prepare your salad. Dice the tomato, place over the mixed greens, add salt, pepper, balsamic vinegar, and olive oil. Mix it all together and set aside till ready to serve.
4. Beat the eggs in a seperate bowl. I always like to add a splash of milk too.
5. Pour over the cooked mushrooms and cook to the consistency you like. Add the cheese close to the end.
6. Sprinkle with some truffle salt and pepper if desired.
7. Make yourself a slice of toast (or two), serve up and enjoy.

Monday, August 31, 2009

Getting ready for SF

Today has been a long day. And it's barely over! I am preparing for my 2-week trip to San Fran starting tomorrow, so there was a bunch of preparing and packing that needed to be done. Part of the preparing consisted of making some meals for Mr. Milk to have while I am away. While he is perfectly capable of looking after himself, I figured it would be nice if he had some home cooked meals for those long work days where he can't be bothered to make something (and would most likely pick up the closest take-away menu).

One of the dishes I came up with as I was staring in the refrigerator was a tuna and chickpea salad for dinner tonight. We are lucky to live in a building in Vancouver that promotes community living, and has an organic vegetable garden in the back which is accessible to all the residents. We had some fresh heirloom tomatoes, zucchini, and parsley from the garden so I combined these with a small tin of tuna (packed in olive oil and dolphin safe of course!) and made this salad.

All you need are the following ingredients:

A can of chickpeas (or garbanzo beans)
A medium sized tomato, diced
A can of tuna
A tablespoon of chopped parsley
A medium zucchini (diced, lightly sauteed in light olive oil till golden brown, and cooled)
Salt/pepper to taste
Juice of half a lemon
A tablespoon of olive oil
Mix all in the ingredients in a bowl and let it sit in the refrigerator for an hour or so before serving.

Wednesday, August 26, 2009

Home-Made Pizza

Cooking is something I love to do. I find it relaxing, creative, and you are typically left with something yummy to eat! I love to bake too, although I admittedly do less of this, and when I do bake it’s with chocolate in some form or another. Now that Mr. Milk and I are living in the same location, I’ve found that I enjoy cooking that much more. Let’s face it, it’s not a lot of fun cooking for just one!

This past weekend Mr. Milk and I went on a bike tour of the Fraser Valley with Slow Food Vancouver. We biked from farm to farm in the beautiful countryside tasting cheeses, ice-cream, salmon, baked goods, and fresh fresh produce! We were lucky and had great weather on both days. One of the “slow stops” was Anita's Organic, selling organic flours, whole grains, legumes, bran, and flakes. While we were there, I got the idea to buy some flour and make home-made pizza from scratch. We bought the “White Whole Wheat, Fresh Fine Grind” flour, and last night we made some pizza. I decided to be a little creative with it and use mostly non-traditional toppings. Here’s the recipe for the dough and our toppings, although you can put pretty much whatever you choose on it :)

Dough

 ½ teaspoon sugar
1 package dry yeast
½ cup warm water
1 ½ cups flour + extra for flouring surface (we used the white whole wheat flour)
2 teaspoons extra virgin olive oil
½ teaspoon salt
Cooking spray

1. Dissolve the sugar and yeast in warm water in a bowl and let it stand for 5 mins
2. Add the flour, salt, and oil to the yeast mixture and stir until it forms into a dough. If it sticks to your fingers add some more flour.
3. Knead for 5 mins
4. Spray a large bowl with cooking spray (or spread a small amount of olive oil if you don’t have cooking spray) and place the dough in the bowl, coating it with the oil
5. Cover and let it sit in a warm place for 45-60mins
6. Punch dough done and form into a ball, and let it sit for another 30mins, covered.
7. Place some flour on your countertop to prevent dough from sticking and roll it out into whatever shape you prefer.
8. It’s ready for toppings!

So now the fun part! I made the pizza on a large baking sheet and decided to top it with roasted eggplant, roasted yellow peppers, roasted asparagus (cut thinly, place on a cookie sheet, add salt and pepper to taste, olive oil, and bake for 15mins at 400°F. Let cool before placing on pizza), mushrooms, heirloom tomatoes, prosciutto, fresh basil, red onions, shredded mozzarella cheese, and dried oregano sprinkled on top. For the tomato sauce base, I bought a can of crushed tomatoes and used that.
Place your pizza in a preheated oven at 350°F for about 40mins or until crust is golden brown and cheese has melted.

Here are the end results. Enjoy!